

How To Change Sender Address In Zoho Campaign
Manage sender email addresses in your Zoho Creator account
You can add together email addresses to your Zoho Creator business relationship and send emails from them upon verification.
- Adding a sender electronic mail
- Activate/Deactivate a sender e-mail
- Deleting a sender email
- Things to know
To add together a sender electronic mail
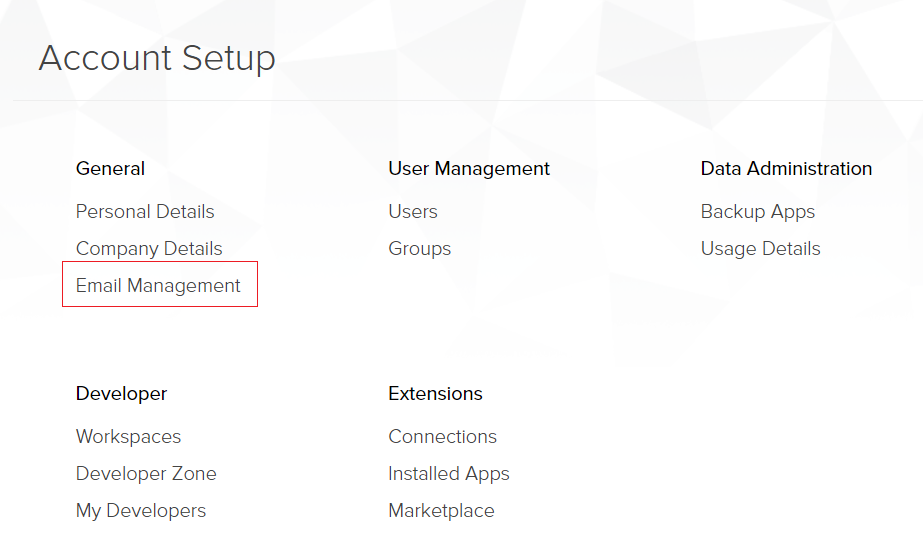
- Go to your Zoho Creator Dwelling.
- Click the Setup icon near the meridian-right corner. You'll be taken to the Account Setup page.

- Click Email Management nether Full general.
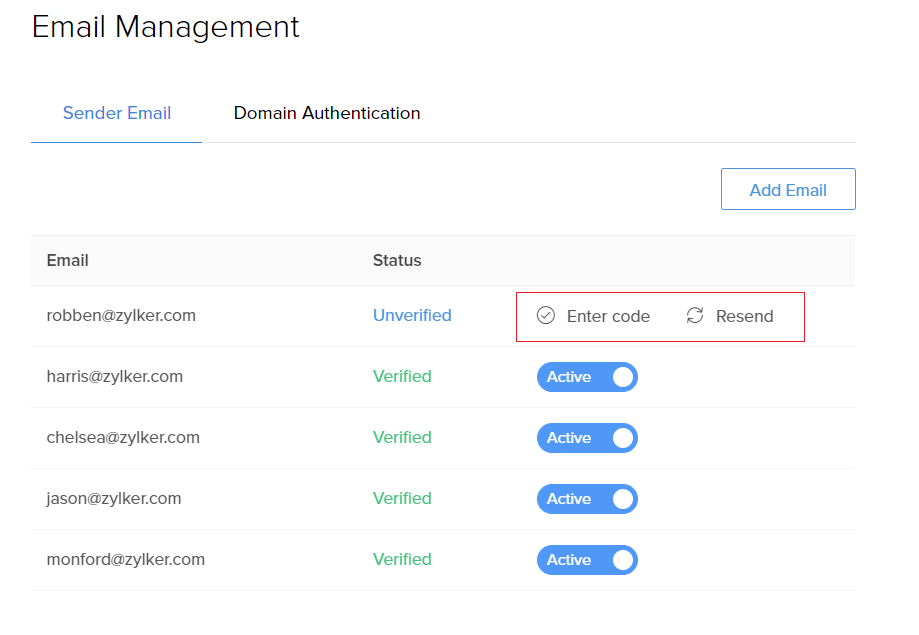
- Select Sender Email. This allows you to add From addresses for emails sent from your Creator app.
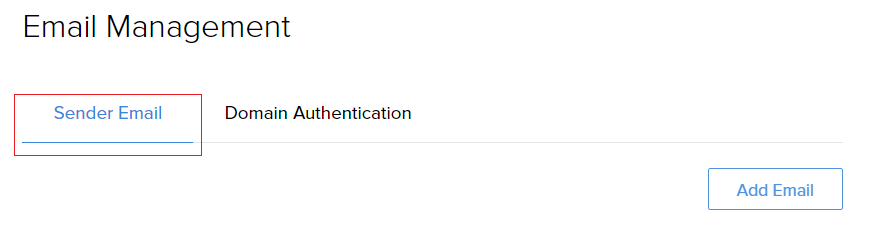
- Click Add together Electronic mail. A pop-upward window will appear.
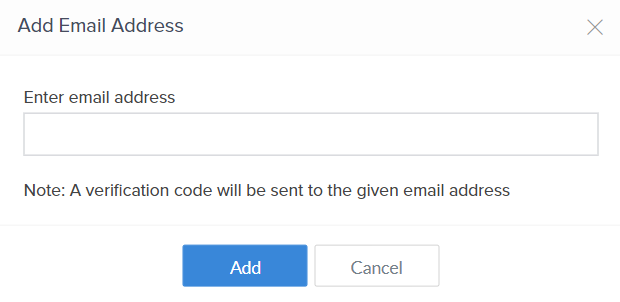
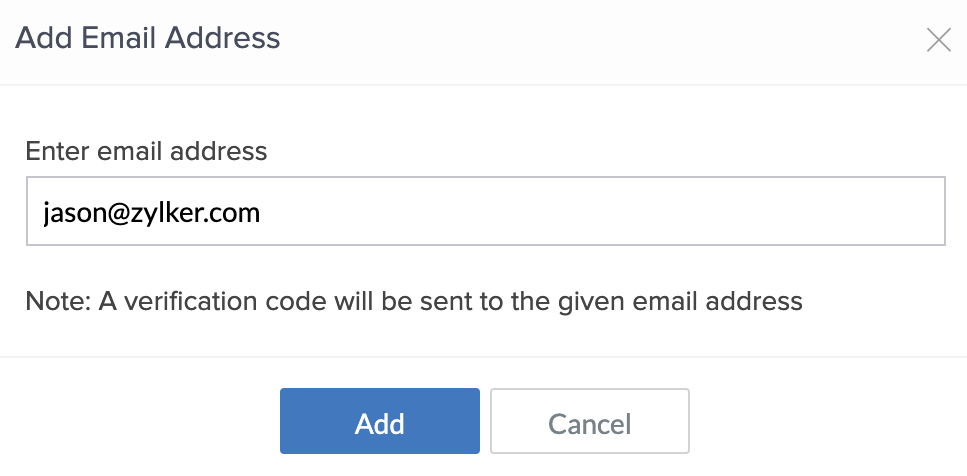
- In the Add E-mail Address popular-up, enter the email address that you want to add as a sender email, then click Add. A verification code will exist sent to this email address.
- In one case you receive the verification e-mail, enter the verification code, and so click Verify.
- The electronic mail address volition appear in the Sender E-mail tab, with condition as Verified.
- You demand not verify a sender electronic mail immediately later on calculation information technology. Information technology can also be done subsequently. In this case, its status will be Unverified and you lot'll encounter the Enter Code and Resend options next to it. Click the required option options and follow from Footstep 6 to complete verification.
To activate/deactivate an email address
Note: But verified email addresses can be fabricated agile and inactive.
- Every email address will take Active/Inactive toggle button nowadays side by side to it. All verified email addresses are 'Agile' past default.
- To deactivate an electronic mail address, click on the Agile/Inactive toggle push button.

Note:
- Simply the active electronic mail addresses will be listed while configuring email tasks.
- The Inactive email address cannot be used every bit the from address in the email tasks nowadays in Workflows, Deluge script, Electronic mail notification chore in Grade properties and Customer portal in App Settings. If the Inactive electronic mail address are already configured in the four references then they will throw an fault
- If the email being made Inactive is the last electronic mail of the particular domain then the domain will also be deactivated. To activate the domain once more, at least one verified email of that domain should be added.
- The email will now exist deactivated.

To delete an email address
- Go to the Account Setup page.
- Click Email Direction under Full general.
- Click Sender Email.
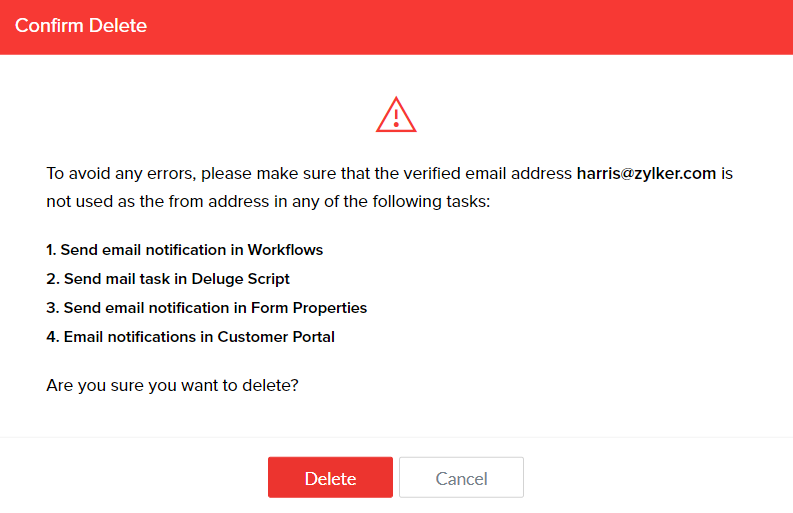
- Hover over the e-mail address which you desire to delete. The 'Delete' icon volition appear. Click the Delete icon.
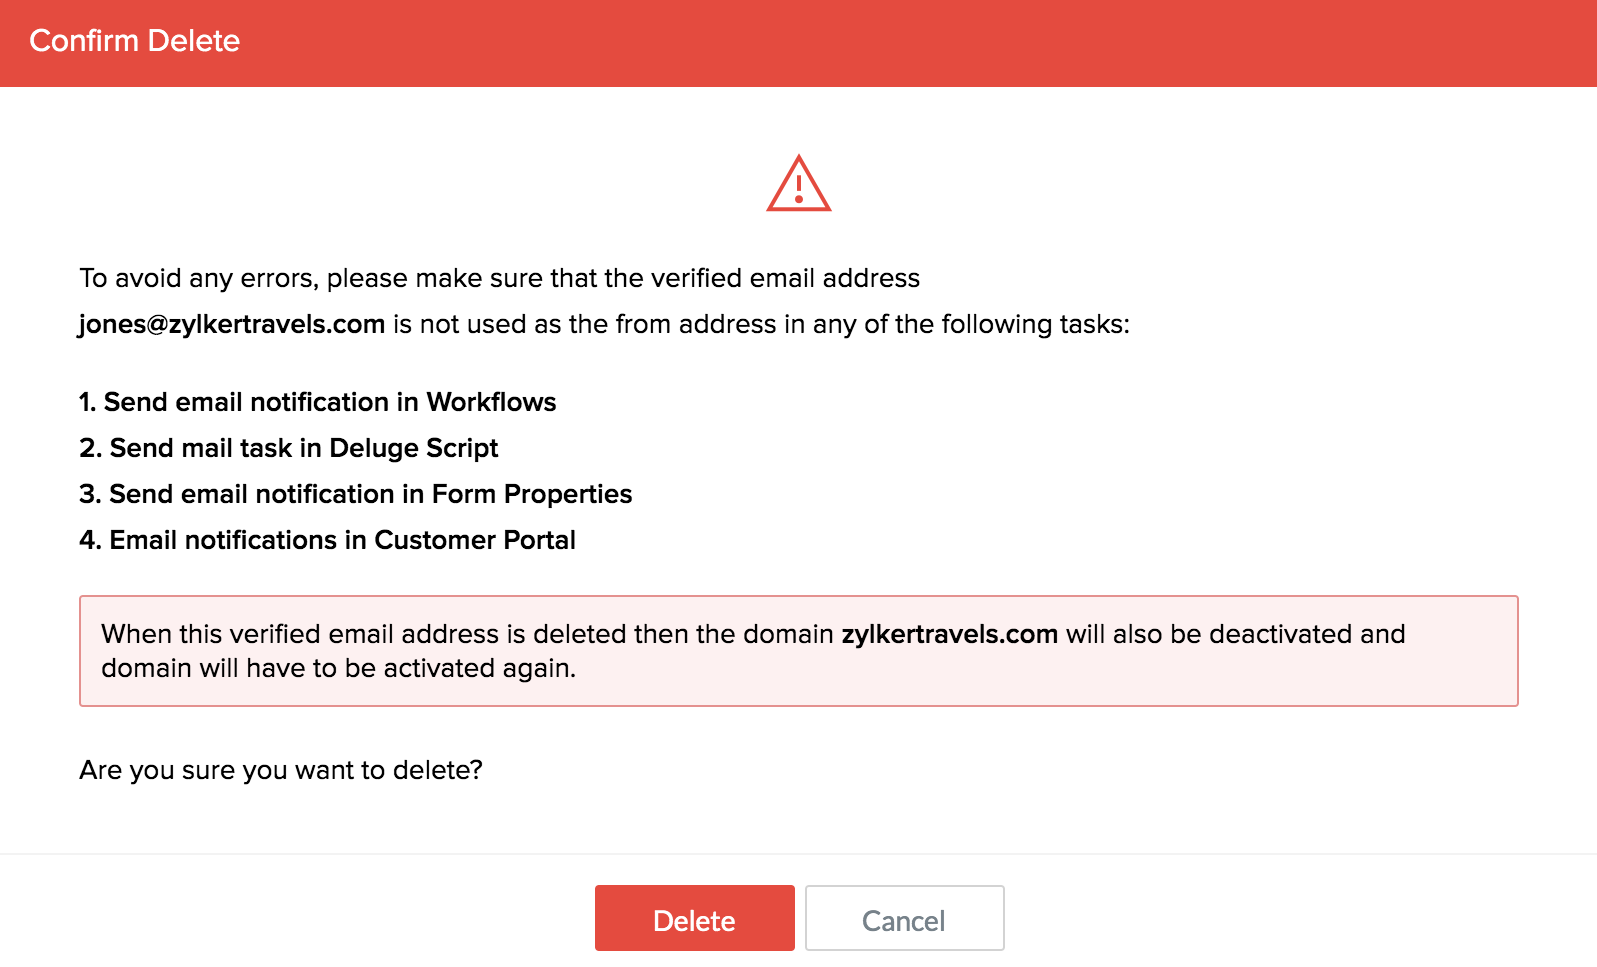
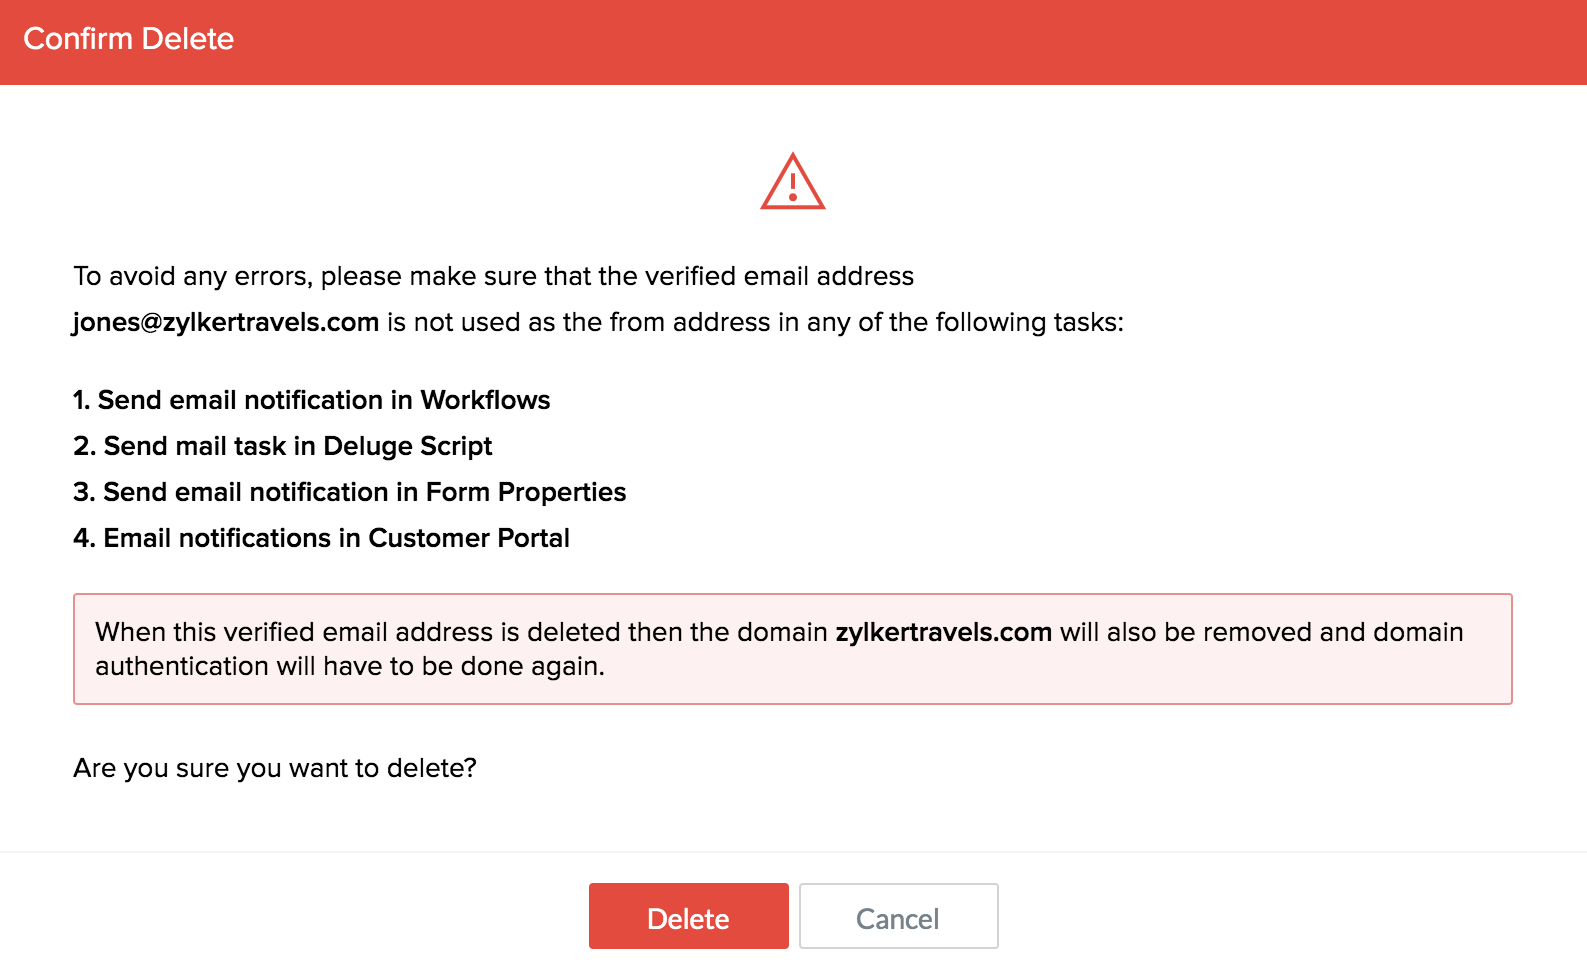
Notation: The email address will be removed from all the post tasks. This may cause errors when these tasks are executed. It is recommended to remove this email accost as sender from all mail tasks before deletion. When all the verified electronic mail addresses associated with a domain are deleted, then the domain volition also be removed from listing in the Domain Hallmark tab and the domain hallmark will likewise be removed.
- Before deleting the email address delight brand sure that information technology is not used equally the from address in the e-mail tasks present in Workflows, Deluge script, Course properties and Customer portal. Click Delete in the confirm delete popup.
- If the email address being deleted is the final active electronic mail of the particular domain and so the domain will be deactivated.
- If the email accost beingness deleted is the final email of the particular domain then the domain will be removed. To add and authenticate the domain over again, you need add together at least one verified sender email from that domain.
- If the email address being deleted is the final active electronic mail of the particular domain and so the domain will be deactivated.
- The email address volition now be deleted.
Things to know
- The number of sender emails that y'all can add is field of study to your subscription. This information is displayed nearly the bottom-right corner of the the Sender Email tab.
- With effect from April 2nd, 2019, accounts in the Bones plan of Creator cannot add sender emails. However, they can continue to utilize the added sender emails.
Related Topics
- Sympathize sender electronic mail in Zoho Creator
- Authenticate your email domain
Source: https://www.zoho.com/creator/newhelp/account-setup/manage-sender-email.html
Posted by: swihartthits1936.blogspot.com
0 Response to "How To Change Sender Address In Zoho Campaign"
Post a Comment